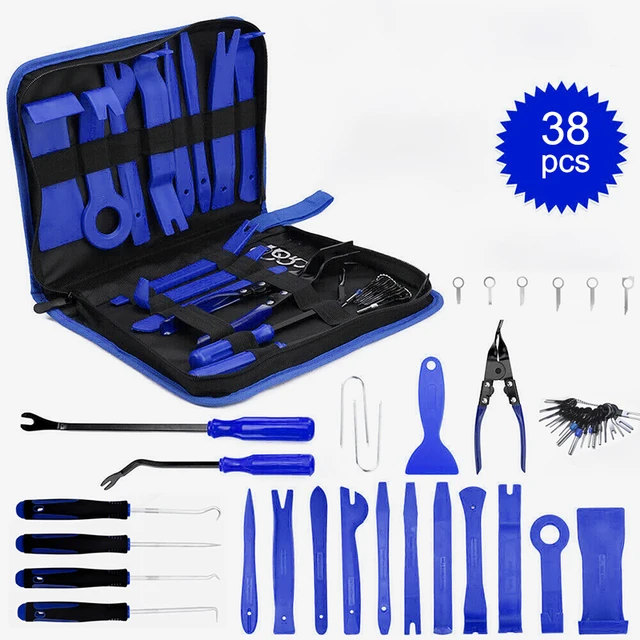
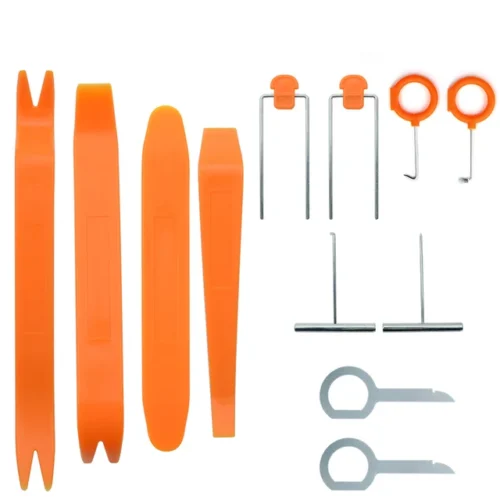
Trim Removal Tool
Original price was: $25.00.$19.65Current price is: $19.65.
Did you like this product? Add to favorites now and follow the product.
(+800) 1234 5678 90 Start Live Chat
Description
Understanding Trim Removal Tools: What They Are and Why You Need Them
Trim removal tools are specialized instruments designed to safely and efficiently remove various types of trim, panels, and fasteners from a vehicle without causing damage. These tools are indispensable for any car enthusiast or professional mechanic, as they provide the precision and control needed to work on delicate car components without the risk of breaking or scratching them.
There are several types of trim removal tools, each tailored to specific tasks. Plastic pry tools are among the most commonly used, as their softer material is less likely to scratch or mar surfaces. These tools are ideal for removing interior panels, dashboard trims, and other components where a gentle touch is crucial. Metal pry bars, on the other hand, are more robust and suitable for heavier-duty tasks, such as prying off exterior trims and tougher clips. Specialized clip removers are designed to effortlessly extract stubborn clips and fasteners, ensuring that they are not damaged in the process.
Using the correct trim removal tools is essential for maintaining the integrity of your vehicle’s components. Improper tools, such as screwdrivers or knives, can easily cause dents, scratches, and even breakage, leading to costly repairs. Trim removal tools are engineered with the specific purpose of providing leverage and control without compromising the materials they interact with.
Common scenarios where trim removal tools prove invaluable include removing door panels to access internal wiring or speakers, detaching dashboard trims for repairs or upgrades, and extracting interior clips to replace or repair upholstery. Each of these tasks requires a different type of trim removal tool to ensure that the process is smooth and damage-free.
In essence, trim removal tools are a vital part of any automotive toolkit. Their specialized design and functionality make them the best choice for safely and efficiently working on car trims, panels, and fasteners, preserving the aesthetic and structural integrity of your vehicle.
How to Use Trim Removal Tools: A Step-by-Step Guide
Using trim removal tools properly is crucial for both vehicle maintenance and avoiding potential damage. Here’s a detailed guide to ensure you use these tools effectively and safely.
Preparation
The first step is to select the appropriate trim removal tools for your specific job. Trim removal sets usually include various tools like pry bars, clip removal pliers, and hook tools. Familiarize yourself with these tools and their specific functions. Before starting the process, ensure your car is securely parked on a flat surface and the battery is disconnected, especially when working on interior panels.
Removing Interior Trim
Begin by gently prying up the edges of the interior trim using a flat pry tool. Insert the tool between the trim and the car’s surface, applying gentle pressure to avoid scratching or breaking the trim. Work your way around the trim piece, gradually loosening it. If you encounter resistance, check for hidden clips or screws that might need removal. For clips, use clip removal pliers to carefully extract them without applying too much force.
Removing Exterior Trim
Exterior trim, such as moldings and badges, can be more challenging due to their exposure to the elements. Utilize a combination of pry tools and hook tools to carefully lift the trim away from the vehicle. Start at one end and slowly work your way to the other, ensuring even pressure is applied. Be mindful of painted surfaces to avoid scratches. For adhesive-backed trim, use a heat gun to soften the adhesive before removal.
Avoiding Common Mistakes
Avoid using excessive force, as this can damage both the trim and the vehicle. Always use the correct tool for each specific task; using a screwdriver, for example, can lead to scratches or breakage. Patience is key; rushing the process often results in costly mistakes.
Maintenance and Storage
After use, clean your trim removal tools with a mild detergent and water to remove any debris or adhesive residue. Dry them thoroughly to prevent rust, and store them in a dry, organized space. Proper maintenance ensures your tools remain effective and prolongs their lifespan.
By following these steps, you can safely and efficiently use trim removal tools, maintaining the integrity of your vehicle and the longevity of your tools.


Reviews
There are no reviews yet.